
So here is my journey to accomplish my final product.

First, this is the site I referred to for guidance.
Let's talk ties. Unless you have just been dying (pun totally intended) to glean your husband's closet and get rid of all his atrocious ties, visit your local Goodwill. At a $1.50 each, you have your choice of dozens and dozens of ties.
The ties you select must be silk - 100% silk. There are tags on the ties that tell you. If there are no tags, don't take a chance.
The pattern is key. I didn't really realize how much until afterwards so please learn from my journey. Pick the brightest, loudest ties. Ties you would never wear or purchase for someone. Those have good potential to transfer a nice pattern.
Here are some pics of the ties I chose and the results so you can see my point.

These first two were the same tie, but I turned it inside out for the second egg. Not all ties have such a bold inside.


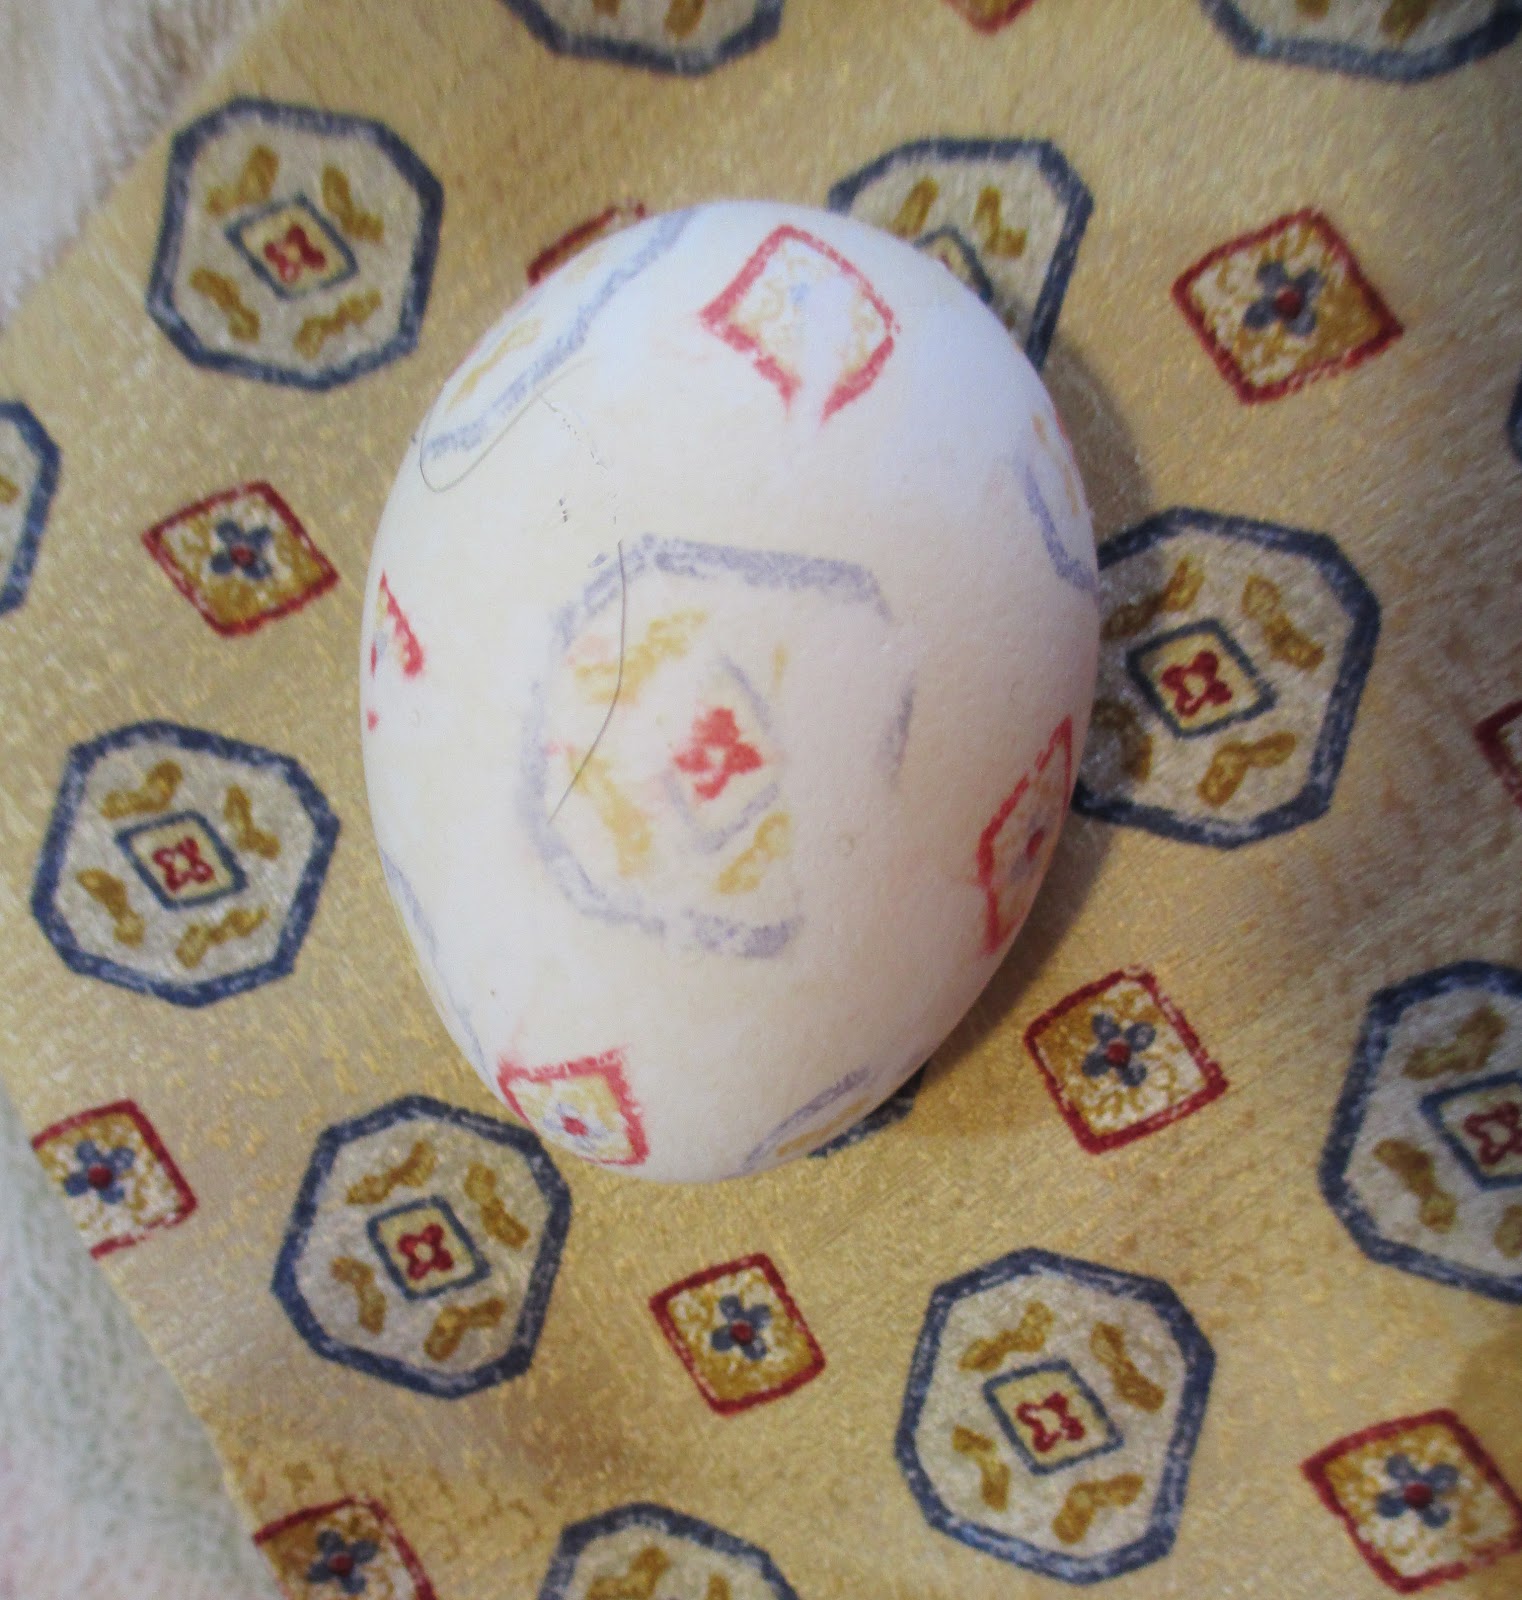
This one was by far the best. The colors were a deep red and olive green, not atrocious at all. But apparently the small patterns come across better.

Worst one. Dark, muted colors that have too large of a pattern.

Not bad. Again the intricate patterns work well. And reds always come through the best.

Another good example of the right kind of pattern/color.

And another.
The yellow on this one didn't come through much, but the patterns did.
Okay, you have your ties. Let's talk pans. The pan you choose to boil them in is important. Stainless steel or enamel work best. Aluminum will get pitted with the acidy vinegar and non-stick, well, it might flake it off.
I used enamel. Thank you, Becki.
Cut the threads that are holding them together up the back and remove the wool lining (keep it). At first I was cutting off the V-point but then I realized it can be used, you just have to trim out the satin lining. Your trimming and cutting do not have to be neat. We are boiling it after all.
Cut a piece of tie about 5x7 and wrap your uncooked eggs like a present. Roll it and fold the ends over. Then use the wool lining to wrap it up like a ball of yarn. Then secure with rubber bands.

Wash. Rinse. Repeat.
Sometimes I can get two eggs per tie, depending on how neat it cuts apart. If you do get two, you need some other outer wrapping as you should use the entire wool lining for one egg. I used socks that had no pair. I gave those lonesome suckers something to do instead of sitting on top of my dresser collecting dust.
I had my water warming up while I was doing this so when I reached six, it was boiling. Six was what I could fit in my pan. You may be able to do more at a time.
Boil with 2 T. of vinegar for 11-12 minutes. Set aside to cool and reuse your water for the next batch - I added a little more vinegar.
After they have cooled enough to handle, unwrap your little presents.


2 comments:
Hey! WAY COOL! Great job. They are beautiful.
You're welcome! I do really like these. Every year I say I want to try Pysanky eggs, but I still have never bought the equipment to do them. Maybe next year.
Post a Comment